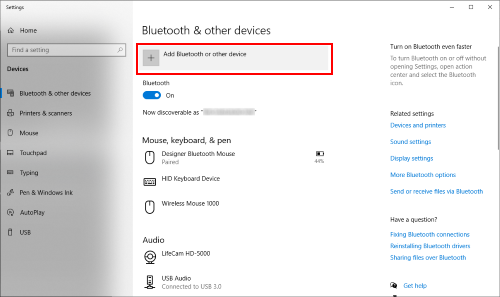
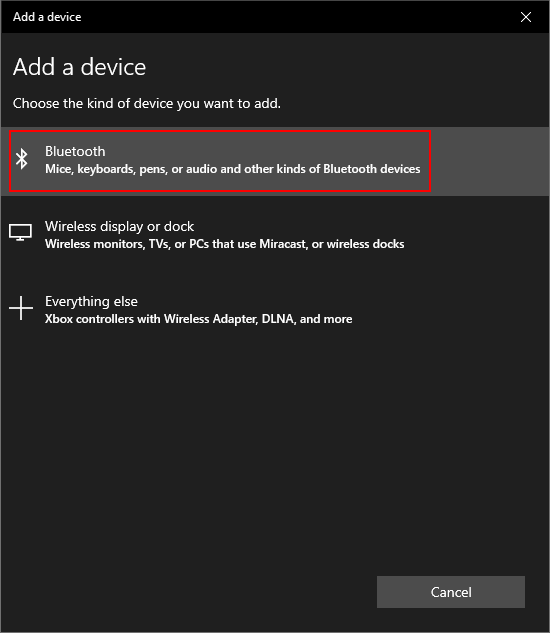
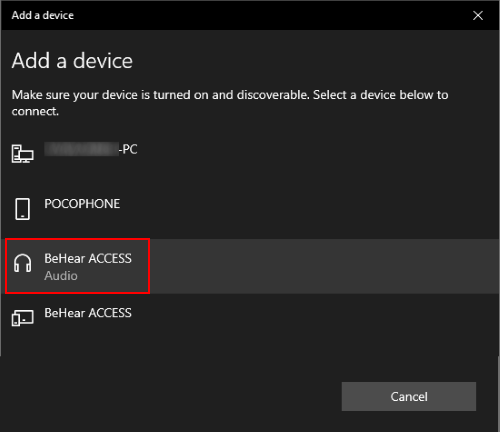
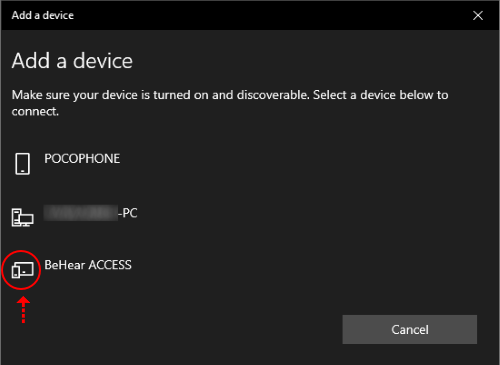
You may have seen other products that use the same form factor as BeHear PROXY. However, although the industrial design is the same, the electronics inside, feature set, and audio performance are different. PROXY supports the following features which are non-existent in the generic products with the same form factor: In addition, PROXY uses Alango’s proprietary DSP software for remote voice communication (mobile phone calls) with significant improvement of sound quality compared to standard solutions used in generic products. This is especially important for phone conversations heard through loudspeakers. BeHear PROXY weighs 9 ounces (256g). It fits comfortably around your neck and rests on your collar bone. Yes, our assistive hearing headsets are designed to give you personalized amplification for computer-generated audio and conference calls, as well as live conversations. For conference calls with apps such as Skype, Zoom, MS Teams, Google Meet, and WebEx, you will simply need to pair the BeHear headset with the sound source (smartphone or computer) and select BeHear in the conference platform’s audio settings. Note: If you don’t follow the sequence detailed above, and instead start searching for new device in the PC while your headset is simply ON (not in pairing mode), BeHear will appear in the list as unknown device, with no “audio” under the name and no “headphone” icon next to it. Connecting to this device will not activate BeHear as a headphone/headset.
General - Pre-Sales Questions
Operating Instructions
Technical
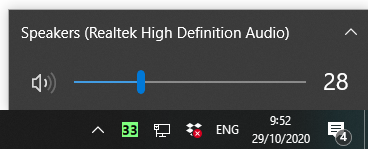
The name that appears should be “BeHear” and not “Speakers”. If you see the name “Speakers” click the ^ (arrow). If the BeHear is connected properly you will be able to see it listed under the list of playback devices. Choose the “Headset” option. 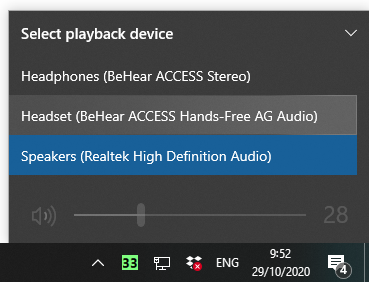
Contact Us
BeHear – Alango Technologies Ltd
2 Etgar Street
Tirat Carmel, 3903213 ISRAEL
General Inquiries
For more information about our assistive hearing products, please complete the form below.

